A Beginner's Guide To Prepare Files For Print
You want something printed. Something big, bold, and sharp. You find the right place to make this happen for you. It gets printed - it’s big, bold, but fuzzy as hell. You’re pissed. How is your vision supposed to come to life when your image is all but 10 pixels. The print shop must have done something wrong… In reality, one of the likely causes for the fuzzy photo is the incorrect file set up for print.
Let’s talk about the importance of high-resolution images and the difference between vector images vs. raster images when it comes to print files so that the next time you have a grand print in mind it comes out sharp. To start, let’s define a few of the most relevant terms:
Resolution is defined as the clarity of an image. In other words, if you zoom in or blow up an image is there still detail, or is it pixilated and fuzzy?
Pixels make up the smallest unit of a digital image or graphic that can be displayed. They are the individual squares you sometimes see when images are blown up larger than they should have been. When an image is stretched beyond the original size that is when an image starts to become fuzzy.
Dots Per Inch (DPI) is used to measure the resolution of an image. As the name suggests, the DPI measures how many dots fit into a linear inch. Therefore, the higher the DPI, the more detail can be shown in an image.
Raster Image is a pixel based image. Example files include JPEGs, PNGs and GIFs.
Vector Image is composed of 2D points that are connected by straight lines or curves. Meaning, unlike a raster image that is made up of pixels that cannot be stretched beyond their original size, a vector image based on a mathematical formula and is not reliant upon pixels so it can be scaled to any size. This makes vector images perfect for printing. Example files include EPS, SVG, AI or PDF.
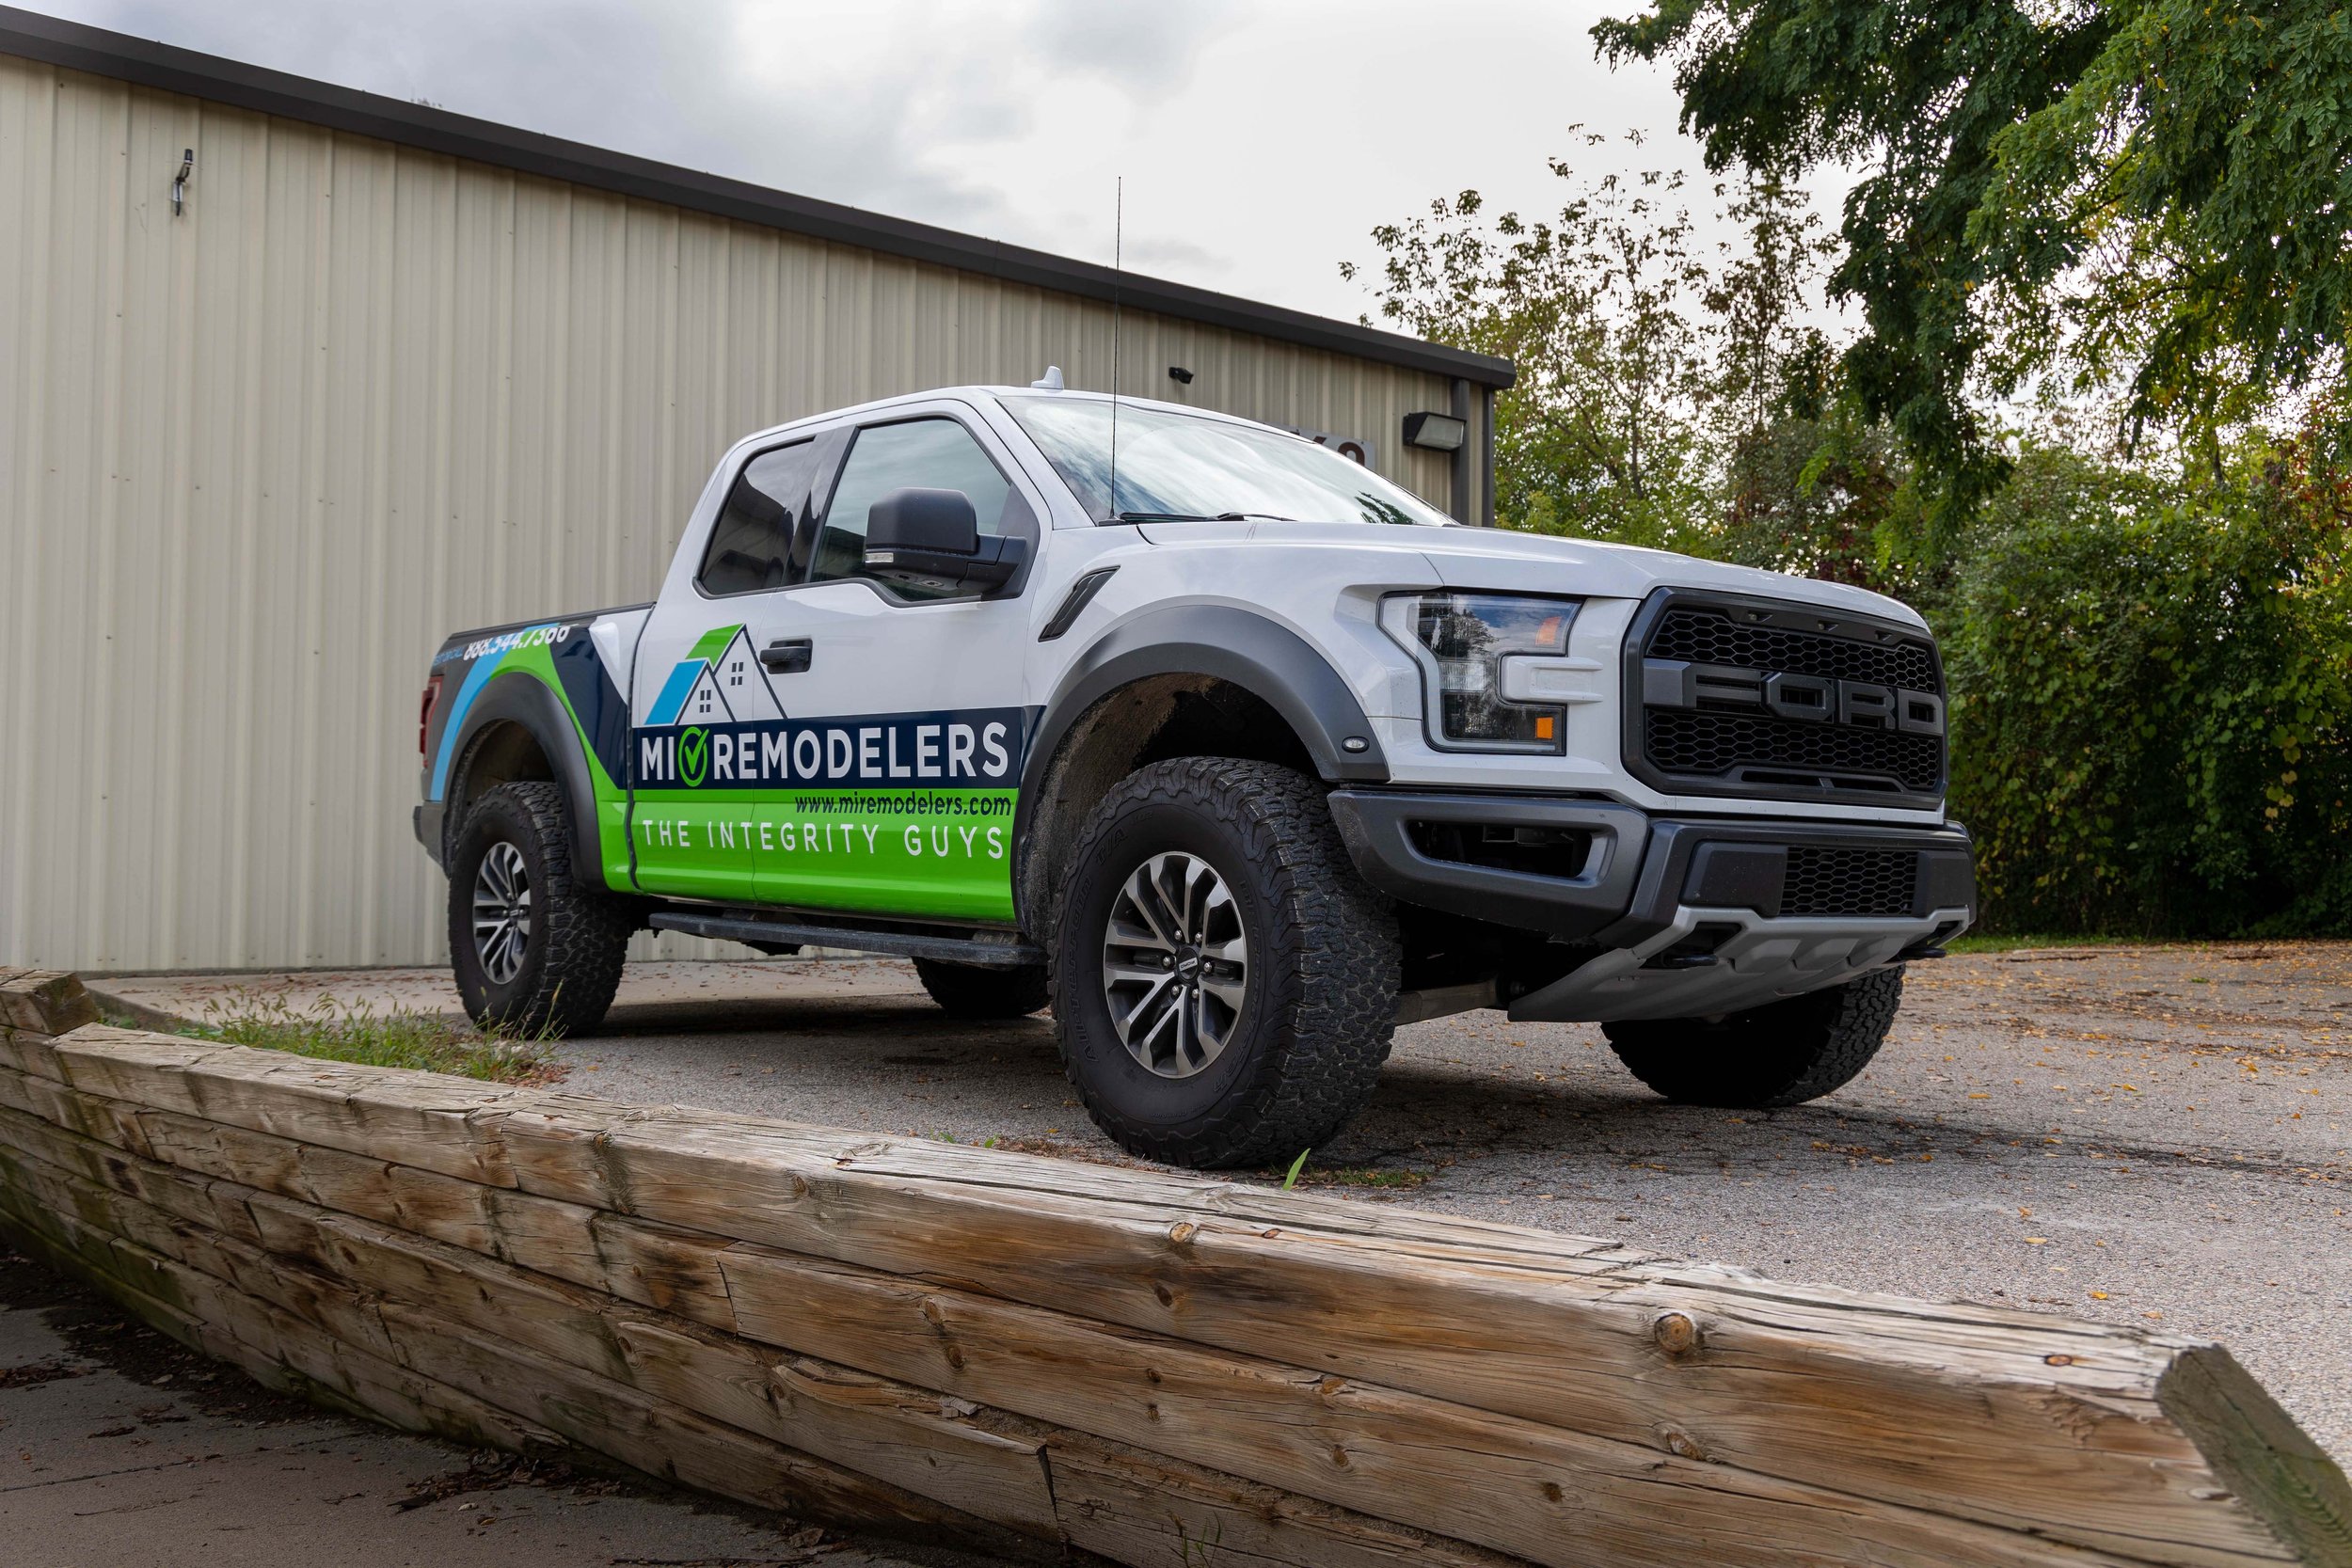
When printing images on a large scale, like posters, banners, billboards, or vehicles you have the choice to use raster or vector. Lets look at an example if we used a raster image. Check out the image below, on the left is a high-res JPEG image and on the right is a low-res JPEG image, or on mobile the top is high-resolution and the bottom is lower-resolution. Hard to see much of a difference at a glance right?
High-Resolution JPEG

Low-Resolution JPEG
Now if we take the same image and blow it up so that it would be the size of a large print, it becomes crystal clear as to why images with higher resolutions are needed for large prints - lower resolutions can’t stack up. With raster image files you have the ability to scale down from their original size, but you cannot scale up without losing quality. There is software out there now that can help scale up certain images, however, the technology is still in its infancy.

High-Resolution JPEG

Low-Resolution JPEG
So why does this happen with raster images? It comes down to the Dots per inch (DPI) that make up a raster image. The higher the DPI, the higher resolution the image. In other words, the more you can zoom in without losing quality. Here is a handy guide to remember when wondering if an image is high enough resolution.
Levels of DPI and where they can be used:
72 DPI - Online and Digital Publications
150 DPI - High Low-Resolution Images
200-300 - Medium-Resolution Images
300 DPI - High-Resolution Images
Bigger DPI is always better for large prints. 300 DPI is the mark to get to for image resolution and can be hard to achieve in some cases, so shoot for mid to high 200s. But how do you find an image DPI number?
A quick way to find out if your image is hi-res on a PC is to right click the image and select properties > select the details tab and scroll down to horizontal and vertical resolution. On a MAC the process is similar, open the file in Preview by right-clicking the file and selecting Open With > Preview. In the Preview window, click Tools > Show Inspector. The image DPI will be shown as Image DPI in the information list.
Not all is bad with raster images, the complexity of each individual pixel and level of detail is unmatched when one is looking to find multiple shades of colors, tones and shadows. They are just not the best for printing.
When in doubt vector images and graphics are the best option for printing. They can be scaled to any size without losing quality. Below is an example between a vector image and a raster image, you can see the pixels in the raster image where the vector image has clean lines and curves.


Vector Image

Raster Image
Vector > Raster
So, with all that newfound information let’s relate it back to printing your important project with large images so that you are happy with the outcome. Before sending it off to print double-check all of your images to make sure they will scale up correctly on a large format print. If you have a vector image use that first and if you must use a raster image, use the information above to help determine if it will work. If you are still unsure, ask your printing professional, they should be able to tell you how the final product will turn out…and if you are looking for a place… I know just the one!
The team at MAD Creative Concepts knows how important high-resolution images are to print work. Our graphic designers and print room lead check all the images going through our facility to make sure they are printed in the highest quality and you know what to expect. That’s the difference that over 15 years of experience in marketing, design, and manufacturing experience makes. Give us a call or drop us an email at info@madcreativeconcepts.com to see how we can help with your next project.